Virtual memory is one of the most important yet least understood features of Windows operating systems. Whether you are using Windows 10 or Windows 11, virtual memory plays a crucial role in maintaining system performance, stability, and multitasking efficiency. Many users experience slow performance, freezing, or error messages without realizing that poorly configured virtual memory could be the cause.
This tutorial provides a complete step-by-step guide to understanding and managing virtual memory in Windows 10 and Windows 11. You will learn what virtual memory is, how it works, when you should adjust it, and how to configure it correctly for different use cases such as gaming, professional work, or low-RAM systems.
What Is Virtual Memory in Windows?
Virtual memory is a memory management feature that allows Windows to use a portion of your hard drive or SSD as extra RAM. When physical RAM becomes full, Windows temporarily moves inactive data to a special file on your storage device called the page file (pagefile.sys).
This process allows:
-
Applications to continue running smoothly
-
The system to avoid crashes due to low RAM
-
Better multitasking on limited hardware
In simple terms, virtual memory acts as a backup memory system when your physical RAM is not enough.
Why Virtual Memory Is Important
Virtual memory is critical for several reasons:
-
Prevents system crashes when RAM is full
-
Allows large applications to run on low-RAM systems
-
Improves system stability during multitasking
-
Supports memory-intensive tasks such as video editing and gaming
-
Ensures background services run smoothly
Without virtual memory, Windows would frequently freeze or crash when RAM usage reaches its limit.
Difference Between RAM and Virtual Memory
Understanding the difference helps you manage virtual memory better:
RAM (Random Access Memory)
-
Physical hardware installed on your computer
-
Extremely fast
-
Limited in size
-
Used for active processes
Virtual Memory
-
Uses storage drive (HDD or SSD)
-
Slower than RAM
-
Can be increased manually
-
Used for inactive or background processes
Windows automatically balances both to optimize performance.
How Virtual Memory Works in Windows 10/11
Windows constantly monitors RAM usage. When RAM usage reaches a certain level:
-
Less-used data is moved from RAM to the page file
-
RAM is freed for active applications
-
When needed again, data is moved back into RAM
This process is automatic and usually invisible to users, but incorrect configuration can lead to performance issues.
Default Virtual Memory Settings in Windows
By default, Windows:
-
Automatically manages virtual memory size
-
Allocates space based on installed RAM and system usage
-
Adjusts dynamically as needed
For most users, automatic settings work well. However, advanced users may benefit from manual configuration.
When Should You Manage Virtual Memory Manually?
You should consider manual configuration if:
-
You have less than 8GB RAM
-
You experience frequent “Out of Memory” errors
-
Your system becomes slow during multitasking
-
You run heavy software (editing, 3D rendering, virtual machines)
-
You want to optimize gaming performance
-
You have an SSD and want better memory handling
How to Check Current Virtual Memory Settings
Before making changes, check your current configuration.
Steps
-
Press Windows + R
-
Type sysdm.cpl and press Enter
-
Go to the Advanced tab
-
Under Performance, click Settings
-
Go to the Advanced tab
-
Under Virtual Memory, click Change
You will now see current virtual memory settings for each drive.
Understanding Page File Options
Windows provides several configuration options:
Automatically Manage Paging File Size
-
Recommended for most users
-
Windows dynamically adjusts size
-
Best for system stability
Custom Size
-
Allows manual control
-
Requires proper calculation
-
Useful for advanced users
No Paging File
-
Not recommended
-
Can cause crashes and errors
-
Only suitable for high-RAM systems with special needs
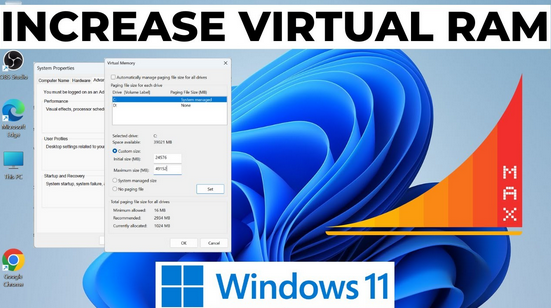
How to Manually Set Virtual Memory (Step-by-Step)
Step 1: Open Virtual Memory Settings
-
Follow the steps mentioned earlier to reach the Virtual Memory window
Step 2: Disable Automatic Management
-
Uncheck Automatically manage paging file size for all drives
Step 3: Select System Drive
-
Usually C: drive
-
Select it and choose Custom size
Step 4: Enter Initial and Maximum Size
Recommended Formula
-
Initial Size: 1.5 × Installed RAM
-
Maximum Size: 3 × Installed RAM
Example (8GB RAM)
-
Initial Size: 12288 MB
-
Maximum Size: 24576 MB
Step 5: Apply Changes
-
Click Set
-
Click OK
-
Restart your computer
Best Virtual Memory Settings for Different Use Cases
For Low-End PCs (4GB RAM or Less)
-
Enable virtual memory
-
Use custom size
-
Set higher maximum limit
-
Avoid disabling page file
For Gaming
-
Keep page file on SSD
-
Avoid very low values
-
Do not disable virtual memory
-
Stable frame rates depend on memory availability
For Professional Work
-
Use custom size
-
Allocate larger virtual memory
-
Helps with large projects and rendering
For High-End Systems (16GB+ RAM)
-
Automatic management usually sufficient
-
Small page file still recommended
-
Disabling completely is risky
Virtual Memory on SSD vs HDD
SSD
-
Faster performance
-
Recommended for page file
-
Less system lag
-
Modern SSDs handle wear efficiently
HDD
-
Slower access speed
-
Can cause delays
-
Use only if SSD not available
If possible, always keep the page file on an SSD.
Common Virtual Memory Errors and Fixes
“Your System Is Low on Virtual Memory”
-
Increase page file size
-
Ensure enough free disk space
-
Restart system
System Freezes or Crashes
-
Re-enable page file
-
Avoid setting very low values
-
Use recommended size
Slow Performance
-
Move page file to SSD
-
Increase RAM if possible
-
Close unnecessary background apps
Should You Disable Virtual Memory?
Disabling virtual memory is not recommended for most users.
Risks
-
Application crashes
-
Blue Screen errors
-
System instability
-
Performance drops under load
Even with high RAM, Windows still benefits from a small page file.
How Much Disk Space Should You Keep Free?
For optimal virtual memory performance:
-
Keep at least 15–20% free space
-
Avoid nearly full system drives
-
Clean temporary files regularly
Virtual Memory and Windows 11 Improvements
Windows 11 includes:
-
Better memory compression
-
Improved RAM management
-
Smarter background process handling
However, virtual memory is still essential and works similarly to Windows 10.
Maintenance Tips for Better Memory Performance
-
Restart your PC regularly
-
Keep Windows updated
-
Remove unnecessary startup programs
-
Monitor RAM usage via Task Manager
-
Upgrade RAM if possible
Frequently Asked Questions
Is virtual memory the same as RAM?
No, virtual memory uses storage space, while RAM is physical hardware.
Does virtual memory slow down my PC?
Only when RAM is insufficient. Proper configuration improves stability.
Can I use USB or external drive as virtual memory?
Not recommended due to speed and reliability issues.
Is more virtual memory always better?
No, too much can waste disk space. Balance is important.
Final Thoughts
Virtual memory is a powerful feature that helps Windows 10 and Windows 11 handle modern workloads efficiently. While most users can rely on automatic management, understanding and manually configuring virtual memory can significantly improve system performance, especially on low-RAM or high-demand systems.
By following this tutorial, you now know:
-
What virtual memory is
-
How it works
-
When to adjust it
-
How to configure it correctly
-
Best practices for different scenarios
Proper virtual memory management ensures a smoother, faster, and more stable Windows experience.