Windows computers are powerful, but over time they can become slow, unstable, or start showing unexpected errors. Many users experience problems such as frequent crashes, applications not opening properly, slow startup times, or background programs interfering with system performance. In most cases, these issues are not caused by Windows itself but by third-party applications or services running in the background.
This is where a Clean Boot becomes extremely useful. A clean boot helps you start Windows with a minimal set of drivers and startup programs. This makes it easier to identify the cause of system problems and improve overall performance.
In this detailed guide, you will learn what a clean boot is, why it is important, when you should use it, and how to perform a clean boot in Windows step by step. This article covers Windows 10 and Windows 11 users and is written in a beginner-friendly yet comprehensive manner.
What Is a Clean Boot in Windows?
A clean boot is a troubleshooting technique used in Windows to start the operating system with only essential Microsoft services and drivers. All non-Microsoft services, startup programs, and background applications are temporarily disabled.
Unlike Safe Mode, which disables many core system features, a clean boot allows Windows to run normally but without third-party interference. This makes it ideal for diagnosing software conflicts.
Key Characteristics of a Clean Boot
-
Loads only essential Windows services
-
Disables third-party startup applications
-
Keeps hardware drivers enabled
-
Allows normal system functionality
Clean Boot vs Safe Mode: What’s the Difference?
Many users confuse clean boot with Safe Mode. While both are troubleshooting tools, they serve different purposes.
Clean Boot
-
Starts Windows normally
-
Disables third-party services and apps
-
Ideal for diagnosing software conflicts
-
Internet and hardware remain fully functional
Safe Mode
-
Starts Windows with minimal features
-
Disables many drivers and services
-
Used for severe system issues
-
Limited functionality
If you suspect a software conflict, clean boot is the better option.
When Should You Perform a Clean Boot?
You should consider performing a clean boot if you experience any of the following problems:
-
Windows starts slowly
-
Frequent application crashes
-
Software not installing correctly
-
Games lag or fail to launch
-
Error messages appear randomly
-
Background apps consume high CPU or RAM
-
Antivirus or system tools conflict with other programs
A clean boot helps isolate the exact service or application causing these issues.
Important Things to Do Before Clean Boot
Before performing a clean boot, take the following precautions:
1. Save Your Work
Any open programs will be closed, so save all important documents.
2. Log in as Administrator
You need administrator access to change system settings.
3. Create a Restore Point (Optional but Recommended)
A restore point allows you to revert changes if needed.
How to Perform a Clean Boot in Windows (Step-by-Step)
The process is almost the same for Windows 10 and Windows 11.
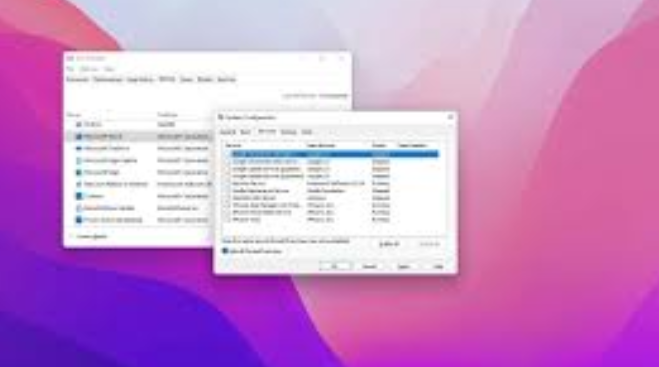
Step 1: Open System Configuration
-
Press Windows + R on your keyboard
-
Type msconfig
-
Press Enter
The System Configuration window will open.
Step 2: Configure Selective Startup
-
In the General tab
-
Select Selective startup
-
Uncheck Load startup items
-
Keep Load system services checked
This prevents non-essential startup programs from loading.
Step 3: Disable Non-Microsoft Services
-
Go to the Services tab
-
Check Hide all Microsoft services
-
This is very important to avoid disabling critical system services
-
-
Click Disable all
This disables all third-party services that may cause conflicts.
Step 4: Disable Startup Programs (Task Manager)
-
Go to the Startup tab
-
Click Open Task Manager
-
In Task Manager, you will see a list of startup apps
-
Right-click each Enabled startup program
-
Select Disable
Repeat this until all startup programs are disabled.
Step 5: Apply Settings and Restart
-
Close Task Manager
-
Click Apply in System Configuration
-
Click OK
-
Restart your computer
Your Windows system will now boot in clean boot mode.
What Happens After a Clean Boot?
After restarting, Windows will load faster and run with minimal background interference. You can now test the issue you were facing.
If the Problem Is Fixed
This means a third-party service or startup program was causing the issue.
If the Problem Still Exists
The issue may be related to:
-
Windows system files
-
Hardware problems
-
Device drivers
In such cases, other troubleshooting methods may be needed.
How to Identify the Problematic Program or Service
To find the exact cause, follow this systematic approach:
Step 1: Enable Services Gradually
-
Open msconfig
-
Go to Services
-
Enable half of the disabled services
-
Restart the computer
If the problem returns, the faulty service is in that group.
Step 2: Narrow It Down
-
Disable half of the problematic group
-
Restart and test again
-
Repeat until the exact service is identified
Step 3: Repeat for Startup Programs
Use Task Manager to enable startup apps one by one and test.
This process may take time, but it is the most reliable way to find conflicts.
How to Return Windows to Normal Startup
Once troubleshooting is complete, you should restore normal startup.
Steps to Restore Normal Startup
-
Press Windows + R
-
Type msconfig
-
Press Enter
-
In the General tab, select Normal startup
-
Click Apply and OK
-
Restart your computer
Your system will now load all services and startup programs normally.
Common Mistakes to Avoid During Clean Boot
1. Forgetting to Hide Microsoft Services
Disabling Microsoft services can cause system instability.
2. Enabling Everything at Once
This makes it harder to identify the problematic program.
3. Not Restarting After Changes
Restarting is necessary for changes to take effect.
Benefits of Performing a Clean Boot
-
Faster startup time
-
Improved system stability
-
Identifies software conflicts
-
Reduces background resource usage
-
Helps diagnose performance issues
-
Safer than uninstalling apps blindly
Is Clean Boot Safe?
Yes, a clean boot is completely safe when done correctly. It does not delete files, uninstall software, or damage Windows. All changes are temporary and reversible.
Clean Boot for Gaming and Performance Issues
Many gamers use clean boot to:
-
Reduce lag
-
Improve FPS
-
Prevent background overlays
-
Fix launcher crashes
Disabling unnecessary background apps frees system resources for gaming.
Clean Boot for Software Installation Problems
If a program fails to install:
-
Antivirus software
-
System optimizers
-
Background utilities
may interfere. Clean boot creates an ideal environment for installations.
Frequently Asked Questions
Does Clean Boot Delete Programs?
No. It only disables them temporarily.
Can I Use the Internet in Clean Boot?
Yes. Network services remain active.
How Often Should I Use Clean Boot?
Only when troubleshooting problems.
Is Clean Boot Permanent?
No. You can return to normal startup anytime.
Final Thoughts
A clean boot is one of the most effective and underrated troubleshooting tools in Windows. Whether you are facing performance issues, software crashes, or unexplained errors, performing a clean boot can save hours of frustration.
By following the detailed steps in this guide, you can safely isolate problematic programs, improve system stability, and restore smooth performance without reinstalling Windows or losing data.
If you use Windows regularly—whether for work, gaming, or everyday tasks—knowing how to perform a clean boot is an essential skill that can help you maintain a healthy and efficient system.